Collecting leads is only useful if your team can act on them quickly.
With QRCodeChimp’s HubSpot integration, you can send data collected through your QRCodeChimp forms directly to HubSpot. You don’t need to move responses manually or route them through another automation tool.
Connect your HubSpot account, choose where the data should go, and map your form fields to the corresponding HubSpot properties. When someone submits the form, QRCodeChimp stores the response and sends the mapped data to HubSpot.
This guide walks you through the complete setup.
- How the QRCodeChimp and HubSpot integration works
- What you need before you start
- Steps to connect QRCodeChimp Forms with HubSpot
- Test your HubSpot integration
- Check the response in QRCodeChimp
- Check the HubSpot integration status
- Verify the contact in HubSpot
- Why check both Form Responses and Integration Details?
- Common issues to check
- Conclusion
- Frequently asked questions
How the QRCodeChimp and HubSpot integration works
The flow is straightforward:
Form submission → QRCodeChimp Form Responses → Field mapping → HubSpot
When someone submits your QRCodeChimp form:
- QRCodeChimp records the complete form response.
- The HubSpot integration checks the object and field mappings you configured.
- The mapped values are sent to HubSpot.
- HubSpot creates the corresponding record.
- QRCodeChimp records the integration status so you can verify whether the data was sent successfully.
One important point is that QRCodeChimp does not automatically send every field in your form. Only the fields you map to HubSpot properties are included in the HubSpot action.
For example, your form might collect:
- Name
- Phone
- Enquiry
If you map only Name, Email, and Phone, all four responses remain available in QRCodeChimp. However, only those three mapped fields are sent to HubSpot.
What you need before you start
Make sure you have:
- A QRCodeChimp account with access to the HubSpot integration
- A HubSpot account you can authorize
- A QRCodeChimp form with the fields you want to collect
- Matching properties available in HubSpot
It also helps to decide where the response should go in HubSpot before you begin.
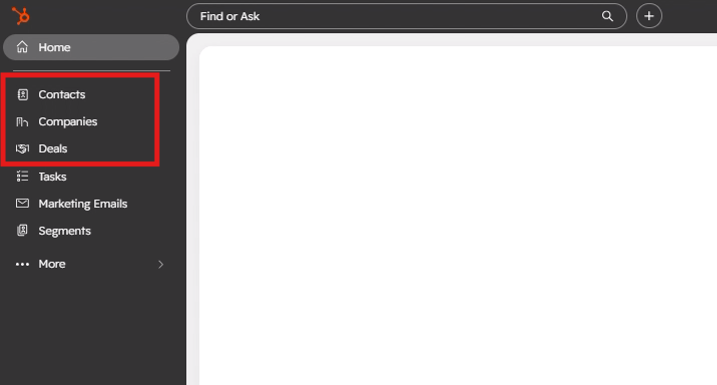
QRCodeChimp lets you select a HubSpot object such as:
- Contact
- Company
- Deal
- Ticket
In this guide, we will use Contact.
Steps to connect QRCodeChimp Forms with HubSpot
Follow these steps to integrate HubSpot with QRCodeChimp forms.
Step 1: Create or open your QRCodeChimp form
Sign in to QRCodeChimp and create a Form QR Code. If you already have a form, open it for editing.
Set up the fields you want visitors to complete. For example:
- Your Name
- Phone
- Your Enquiry
Complete the rest of your form settings as needed.
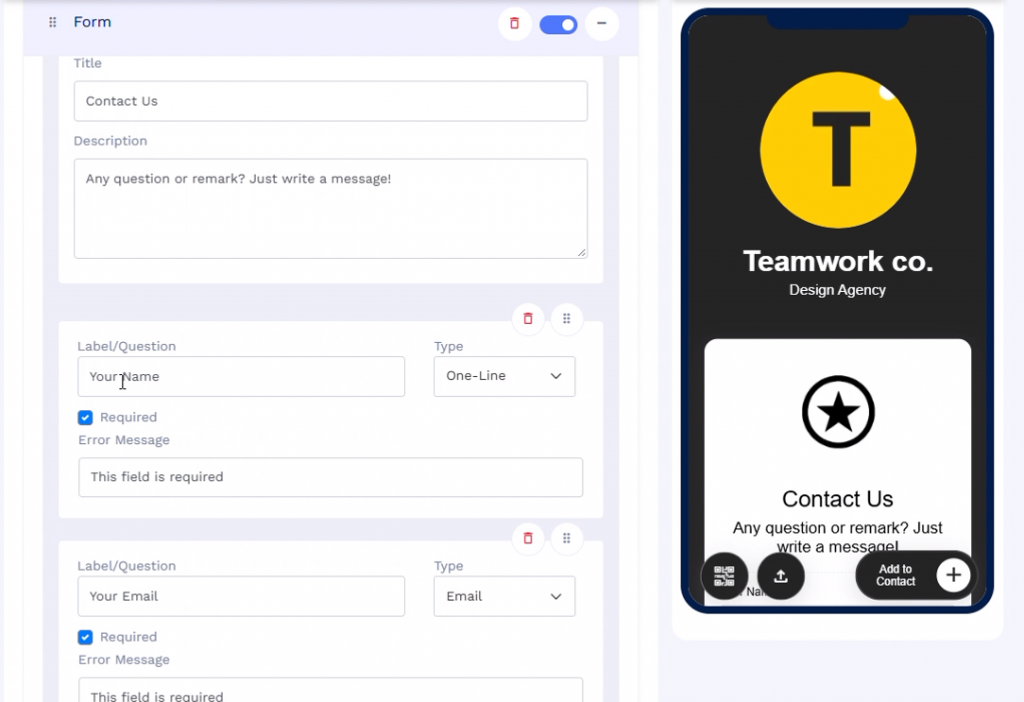
Step 2: Open Form Integration Settings
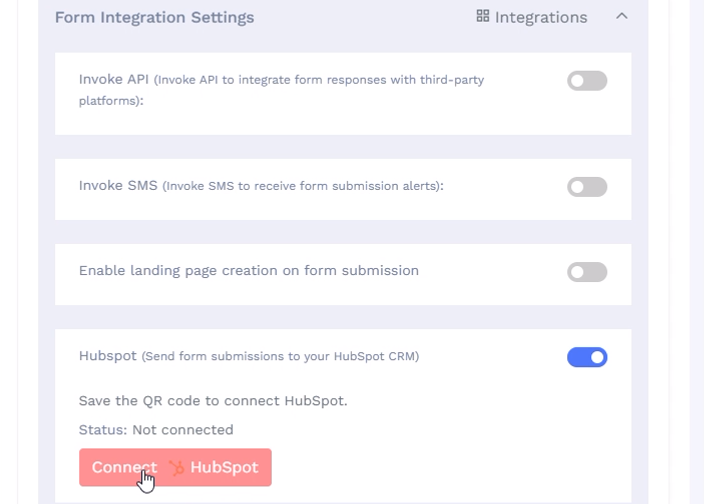
Scroll down to Form Integration Settings in the form editor.
Here, you can configure what should happen after someone submits the form. Find the HubSpot integration and enable it.
Step 3: Connect your HubSpot account
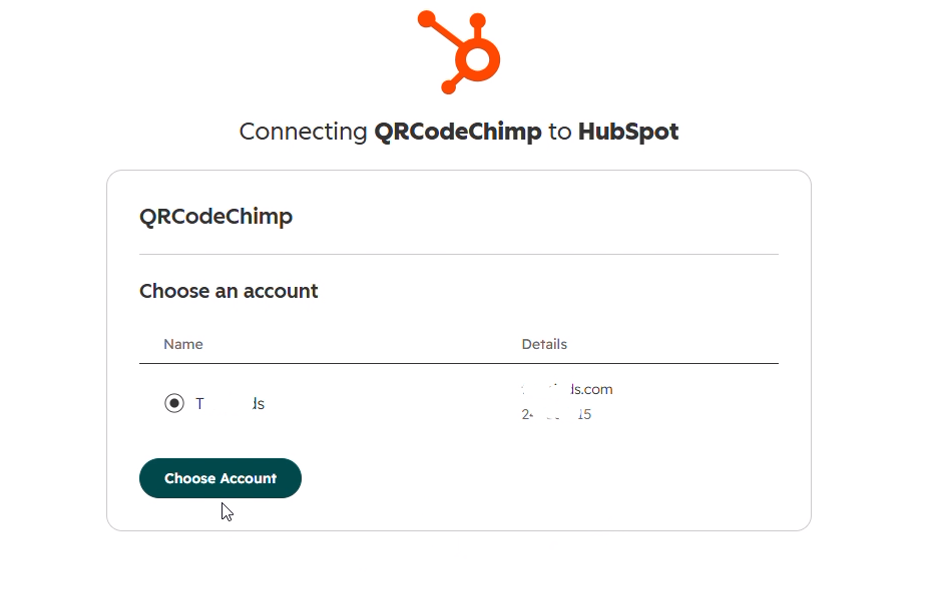
Click the option to connect HubSpot. You will be redirected to HubSpot to authorize QRCodeChimp.
If your HubSpot login has access to multiple accounts, select the account you want to connect.
Choose the account and approve the connection. HubSpot will then redirect you back to QRCodeChimp.
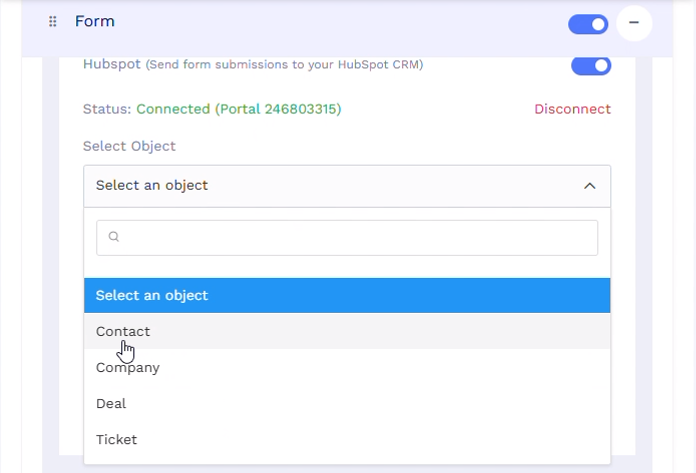
Once the connection is complete, QRCodeChimp will show HubSpot as Connected along with the connected portal information.
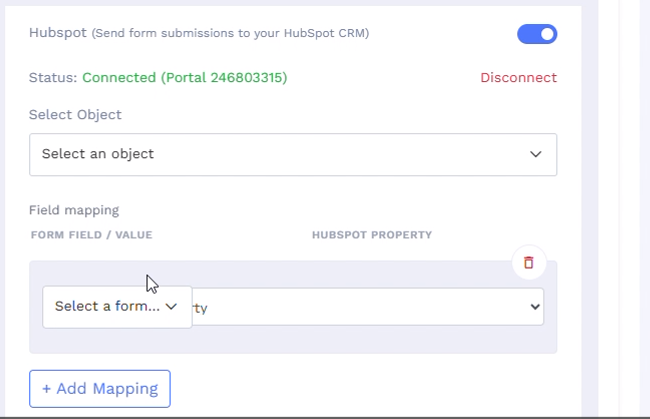
Tip: If you manage more than one HubSpot account, check the portal details before continuing. This helps ensure your form responses are routed to the intended account.
Step 4: Select the HubSpot object
Next, open the Select Object dropdown.
Choose the type of HubSpot record you want QRCodeChimp to create.
The available options shown include:
- Contact
- Company
- Deal
- Ticket
For collecting leads or contact details, select Contact.
Your form responses will now be routed to HubSpot Contact records based on the mappings you configure next.
Step 5: Map your QRCodeChimp fields to HubSpot
Now tell QRCodeChimp where each form response should go in HubSpot.
For every form field you want to send, select its corresponding HubSpot property. Add mappings only for the data you want to send.
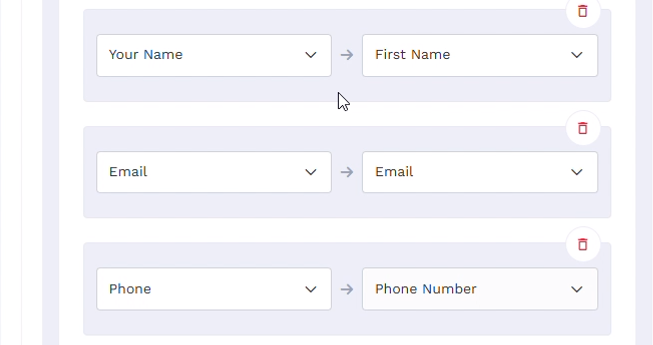
Unmapped fields are still part of the QRCodeChimp form response. They are simply not included in the HubSpot action.
For example, suppose your form also contains Your Inquiry, but you do not map that field.
A user could submit:
- Name: Gwen
- Email: gwen@abindustries.com
- Phone: 8452170369
- Inquiry: Pricing Inquiry
QRCodeChimp would retain all four values.
HubSpot would receive only:
- First Name: Gwen
- Email: gwen@abindustries.com
- Phone Number: 8452170369
If you want the inquiry information in HubSpot too, map it to an appropriate HubSpot property.
Step 6: Save your form
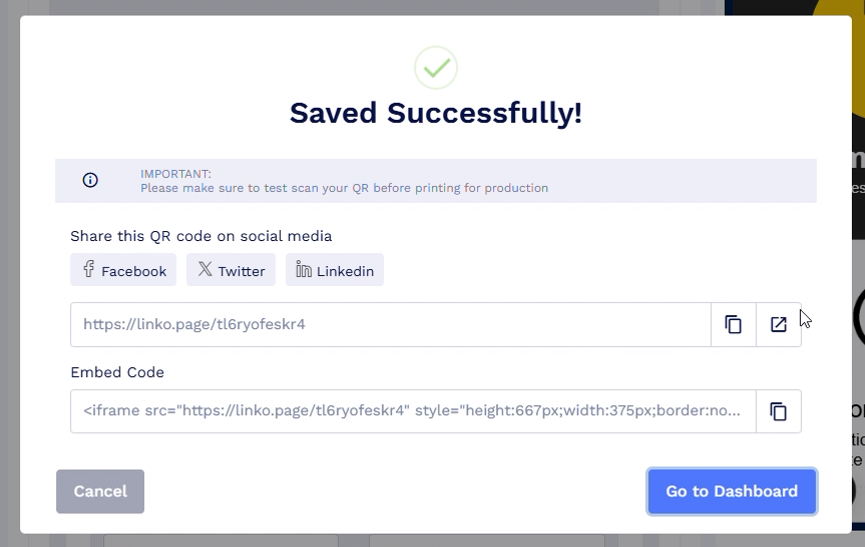
Once your HubSpot account, object, and field mappings are ready, save the Form QR Code. QRCodeChimp will confirm that your changes have been saved.
Your HubSpot routing is now configured.
Test your HubSpot integration
Before using the form in a live campaign, submit a test response. This lets you confirm both sides of the integration.
Step 7: Open and fill out the live form
Open the form using its QR code or direct link. Fill in the fields with recognizable test data.
Accept the required terms before submitting the form.

Step 8: Submit the form
Submit the completed form.
You should see a confirmation message indicating that QRCodeChimp has received the response.
Check the response in QRCodeChimp
Step 9: Open Form Responses
Go back to your QRCodeChimp dashboard.
Open Form Responses.
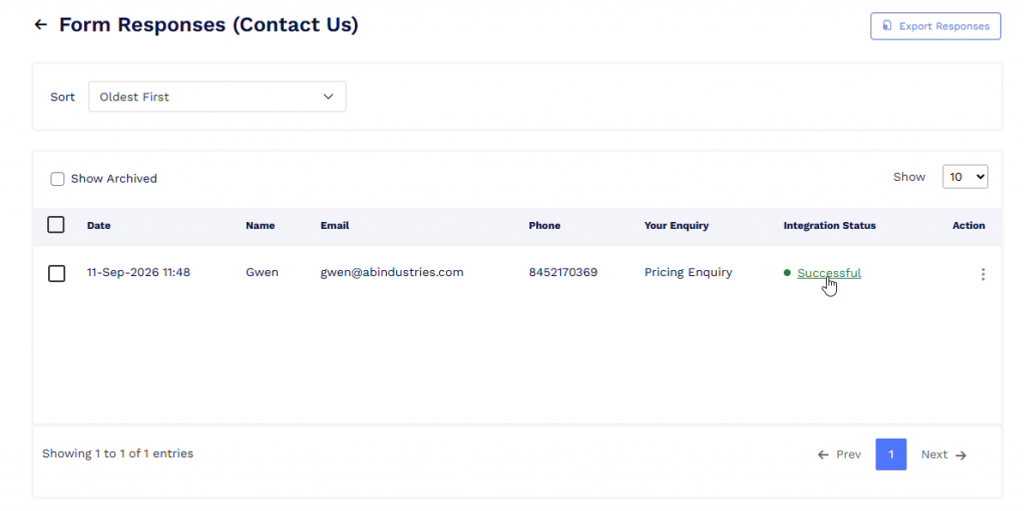
Your new submission should appear in the responses list along with the data entered by the user.
For our example, you would see Gwen’s name, email, phone number, and inquiry.
This confirms that QRCodeChimp received the form submission.

Check the HubSpot integration status
Receiving the form response and sending it to HubSpot are two separate parts of the process.
QRCodeChimp lets you check whether the HubSpot action was completed successfully.
Step 10: Open Integration Details
Open Integration Details for the form response.
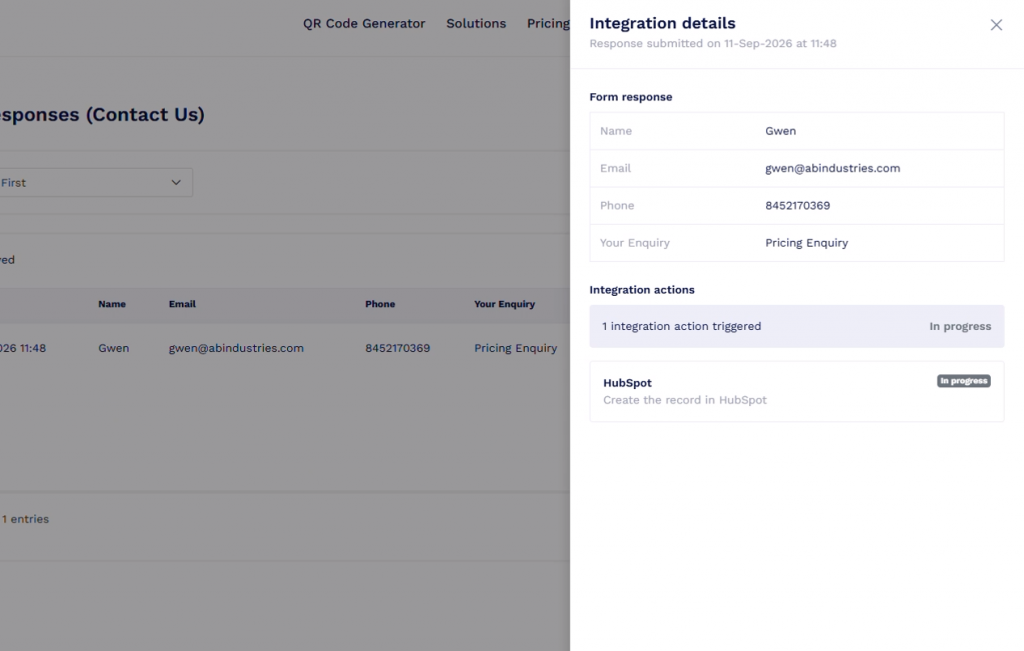
For a successful Contact integration, the details show that QRCodeChimp attempted to create the record in HubSpot and whether that action succeeded.
Step 11: Verify that the HubSpot action succeeded
Once the integration has completed, check the action status.
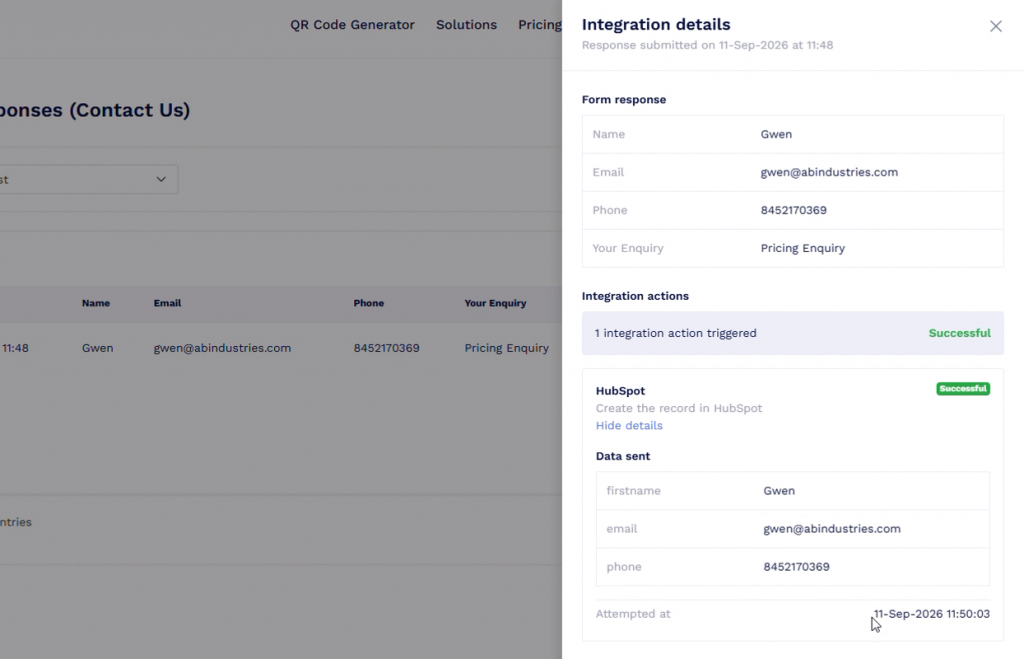
A successful submission shows that one integration action was triggered and that the HubSpot action was successful.
You can expand the HubSpot action to inspect the exact data QRCodeChimp sent.
Verify the contact in HubSpot
Step 12: Open the contact in HubSpot
Once the integration status shows as successful, open HubSpot.
Go to Contacts.
Search for the email address or name used in your test submission.
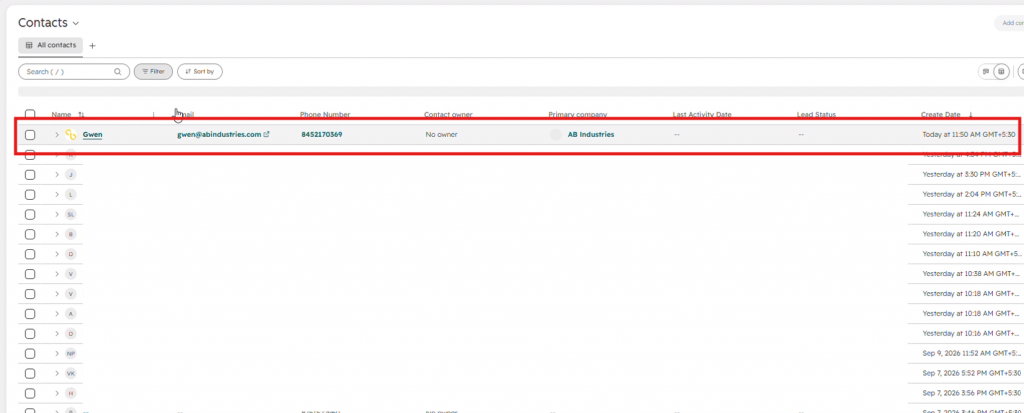
The new contact should appear with the mapped properties.
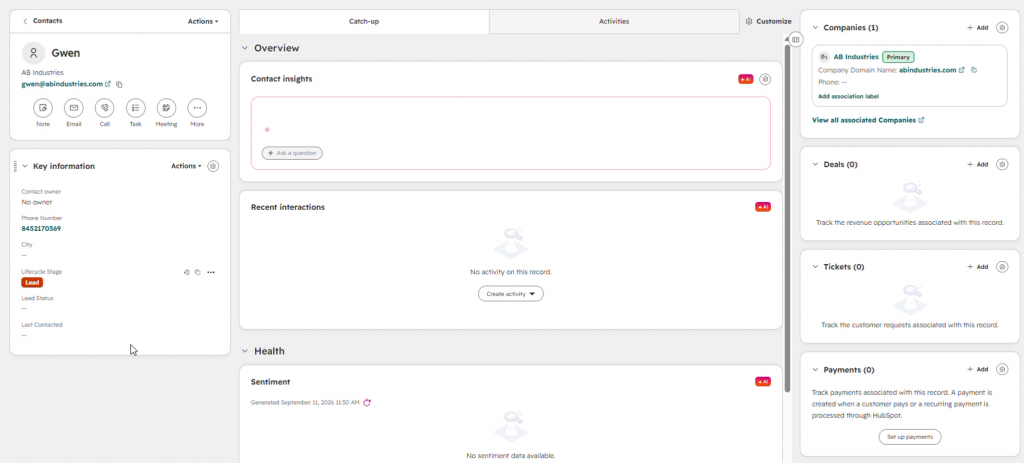
You have completed the flow:
Visitor submits form → QRCodeChimp stores response → mapped fields are sent → HubSpot Contact is created
Why check both Form Responses and Integration Details?
These two sections answer different questions.
Form Responses tells you:
Did QRCodeChimp receive the user’s submission?
Integration Details tells you:
Was the mapped data successfully sent to HubSpot?
This distinction is useful when troubleshooting.
For example, a response may appear correctly in QRCodeChimp while the HubSpot action is still processing or encounters a problem.
Checking Integration Details helps you identify which part of the workflow needs attention.
Common issues to check
Here are some common errors and issues that you may encounter while setting up the integration.
HubSpot shows as disconnected
Reconnect your HubSpot account from Form Integration Settings.
If you have access to several HubSpot accounts, make sure you select the correct one during authorization.
The response appears in QRCodeChimp but not HubSpot
First, open Integration Details for that response.
Check whether the HubSpot action shows as successful, pending, or unsuccessful.
Also confirm that the correct HubSpot object was selected.
Some form values are missing in HubSpot
Check your field mapping.
QRCodeChimp sends the fields that are mapped to HubSpot properties. A value may still exist in Form Responses even if it was not included in the HubSpot action.
A field is being sent to the wrong HubSpot property
Return to the form editor and review the mappings.
For example, confirm that:
Phone → Phone Number
rather than another unrelated HubSpot property.
Save the form after correcting the mapping.
I added a new form field
If you want the new field to appear in HubSpot, return to Form Integration Settings and create the required mapping.
Simply adding a field to the QRCodeChimp form does not automatically decide where that value should go in HubSpot.
Conclusion
Connecting QRCodeChimp Forms with HubSpot gives you a direct path from a form submission to your CRM.
Set up the connection once, choose the HubSpot object, and map the fields you want to send. QRCodeChimp can then store each complete response while routing the mapped data to HubSpot.
You can also use Integration Details to see whether each HubSpot action succeeded and what data was sent.
Before launching your form publicly, submit one test response and verify it in both QRCodeChimp and HubSpot. Once everything appears in the right place, your form is ready to start routing new responses into your CRM.
Frequently asked questions
Do I need Zapier to connect QRCodeChimp Forms to HubSpot?
No. QRCodeChimp supports a direct HubSpot integration for Forms, so you can connect your HubSpot account and map fields from within QRCodeChimp.
Does QRCodeChimp send every form field to HubSpot?
No. HubSpot receives the fields you map to HubSpot properties. Other submitted fields can still remain available in QRCodeChimp Form Responses.
Which HubSpot records can I send form data to?
The integration lets you select the HubSpot object during setup. Options shown include Contact, Company, Deal, and Ticket.
How do I send a form response as a HubSpot contact?
Select Contact as the HubSpot object. Then map your QRCodeChimp form fields to the corresponding HubSpot contact properties.
For example:
- Your Name → First Name
- Email → Email
- Phone → Phone Number
Can I check whether a form response reached HubSpot?
Yes. Open the response in QRCodeChimp and check Integration Details. It shows the integration action, its status, and the data sent to HubSpot.
Why is a field visible in QRCodeChimp but missing in HubSpot?
The field may not have been mapped. QRCodeChimp stores the complete form response, while the HubSpot integration sends the fields configured in your field mapping.
Can I change the field mapping later?
Yes. Edit the form and return to Form Integration Settings. Update your mappings and save the form.
Should I test the integration before using the QR code?
Yes. Submit a test response and verify it under Form Responses first. Then check Integration Details and confirm that the record appears correctly in HubSpot.
You may also like
Airbnb QR Codes: Share Useful Information and Enhance Guest Experience
Discover practical ways Airbnb hosts can use QR codes to share WiFi, guides, directions, and property information while improving the guest experience.
How to Group Cards in QRCodeChimp Entra ID Setup
Learn to organize digital business cards effectively using QRCodeChimp Entra ID grouping. Simplify card management by group, filter, or all-in-one.
How to Prepare Your GS1 QR Codes for Targeted Product Recalls
Learn how GS1 QR Codes can support batch-level and item-level product recalls, and use a 7-step mock recall to test whether your systems are ready.
Google Review Cards: Collect Reviews by Scan or Tap
Google Review cards use a QR code, NFC tap, or both to send customers to your review page. Learn how they work, how to create one, and where to use them.
Most Popular
Contact Sales